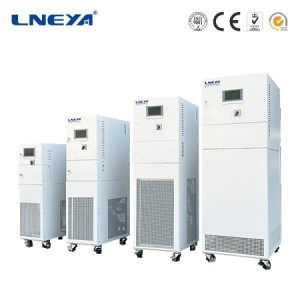
Installation and Operation Sequence of Industrial Chiller
First, the installation procedure of the chiller:
1. During the installation of the chiller, please check whether the machine is damaged and choose a suitable place to facilitate installation and future maintenance.
2. The site where the chiller is installed must be the floor, installation pad or foundation, its level is within 6.4mm, and it can bear the operating weight of the unit.
3. The chiller should be placed in a machine room with a room temperature of 4.4-43.3°C, and there should be enough space around and above the unit for routine maintenance.
4. At one end of the chiller, space should be reserved for the draining of the condenser tube bundle, or a door opening or other suitable openings can be used.
5. Select the water pipe with the appropriate diameter, the cooling system and the cold water system when the unit is running at a higher power, and connect it correctly.
6. For common applications, the speed of water flow through the evaporator and condenser is allowed to be between 1.0-3.6m/s.
7. Under any load conditions, the water flow should be kept stable.
8. The design and installation of all chilled water and cooling water pipes should be carried out in accordance with conventional methods. The chilled water pump should be located on the inlet pipe of the unit to ensure positive pressure and flow in the unit. Vibration reduction pipes should be installed during piping to ensure proper Elasticity, but also to prevent the water from the evaporator being drained when the pump is stopped.
9. The pipeline should have a firm support independent of the chiller to avoid stress on the components of the chiller. The hanger should be set to facilitate the centering of the pipeline.
10. In order to reduce noise and vibration, it is better to install vibration isolators on the pipeline.
11. In order to use the chiller economically and effectively, it is recommended to ask a water treatment expert to analyze the water quality of the evaporator and condenser. Poor water quality will cause fouling and affect heat transfer, or produce corrosion deposits, breed organic matter, and affect the performance of the unit. Increased operating and maintenance costs.
12. In general, proper water treatment and regular cleaning of the tube bundle can maintain its good performance. If the existing water quality conditions cannot be improved by appropriate methods, then it is necessary to consider allowing the tube bundle to have a larger fouling factor or designation. Specialized structural materials.
13. Please install a filter at the inlet of the water pipe and clean it regularly.
14. After the leak test is completed, all nozzles must be treated with rust prevention.
15. In order to facilitate the daily maintenance work, the user can take some (or all) of the following measures:
a) Pressure gauges and globe valves with cocks can be installed on the inlet and outlet pipes of cooling water and chilled water, as close to the chiller as possible;
b) Hanging rails and beams can be erected above the equipment to facilitate maintenance.
Second, the installation requirements of the chiller:
1. Before installing the chiller, please choose a place where the foundation is stable, the surrounding area is open, smooth, and avoid corrosion, pollution, sunlight and rain, and it is convenient for installation and maintenance;
2. Select the matching cooling water tower according to the cooling capacity of the chiller. Please install the chiller piping according to the size of the fuselage throat. Do not reduce the size of the cooling water pipe, which will cause high pressure overload, affect the cooling effect and increase power consumption. ;
3. The air-cooled chiller must be installed in a space more than 1m away from the wall, so as not to cause poor heat dissipation and cause high pressure overload to affect the cooling effect and increase power consumption.
(1) For the power load and grounding parts, please construct in accordance with relevant regulations!
(2) The newly installed chiller chilled water pipe must be covered with insulation!
Third, start-up preparation
Operation must first check whether the following items are correct:
1. Whether the power supply voltage and number of phases meet the model specifications, please refer to the nameplate. (Note: The power supply of chillers above 3HP adopts three-phase five-wire, voltage 380~415V/50HZ power supply phase line is divided into R, S, T , Neutral line (zero line) N, the grounding wire is a double-colored line, which is represented by E, there is a faulty phase protector inside, when the light does not light up or the red light is on and the fault code and alarm signal are displayed at the next startup, the Swap any two phases of the phase wires and then close the switch; refrigerators below 3HP use single-phase power supply, the voltage of 220-240V/50HZ power supply phase line is L, the neutral line is N, and the ground wire is E.)
2. Whether the chilled water pipe and the cooling circulating water pipe are connected to the pipeline, and keep the valve open; (please refer to the installation diagram)
3. Fill the chilled water tank with water or other chilled medium before starting the water pump; (Note: Please use chilled medium as required)
4. Please pay attention to the running direction of the cooling water pump and whether the water tower fan is reversed.
Fourth, the operation sequence of the chiller
1. First, turn on the main power switch to the ON position;
2. Turn on the switches of the cooling water tower and the cooling water pump. At this time, pay attention that the inlet and outlet valves of the cooling water must be opened (Note: The air-cooled chiller does not need to be equipped with a cooling water tower).
3. Turn on the running switch of the chiller again. At this time, the chilled water pump starts to run. Please note that the inlet and outlet valves of the chilled water must be opened. After the delay switch, the compressor will run automatically. Please check and adjust the required temperature.
4. When shutting down, please operate the shutdown in the reverse order.
We are a professional manufacturer of temperature control equipment, supporting customized services, please consult us for details!
Temperature Control Range: -150°C to +50°C

Dynamic Temperature Control Systems
Temperature Control Range: -120°C to +350°C

Temperature Control Range: -40°C to +100°C

Temperature Control Range: -85°C to +250°C

Temperature Control Range: -150°C to -10°C
 LNEYA
LNEYA
 简体中文
简体中文


